When the the main site search is not specific or flexible enough for your needs, use the data viewers. Each database has its own data viewer—a tabular display window to interact with the data—and all of the data viewers share a common set of features.
The data viewers are available from the Databases item on the main menu at the top of every page.
Scrolling
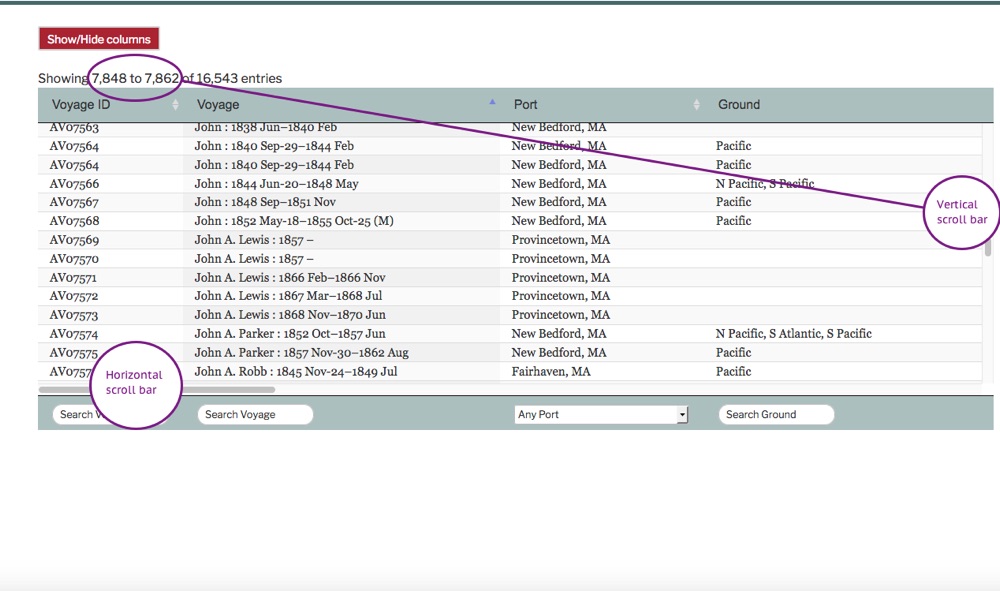
The view displays a scroll bar on the bottom to scroll left-and-right through the available columns. A scroll bar on the right edge scrolls through the records. In the top left, the viewer shows the records currently in the display window. If you have a tablet or other touch screen device, you can also swipe vertically or horizontally to scroll the data.
Showing columns
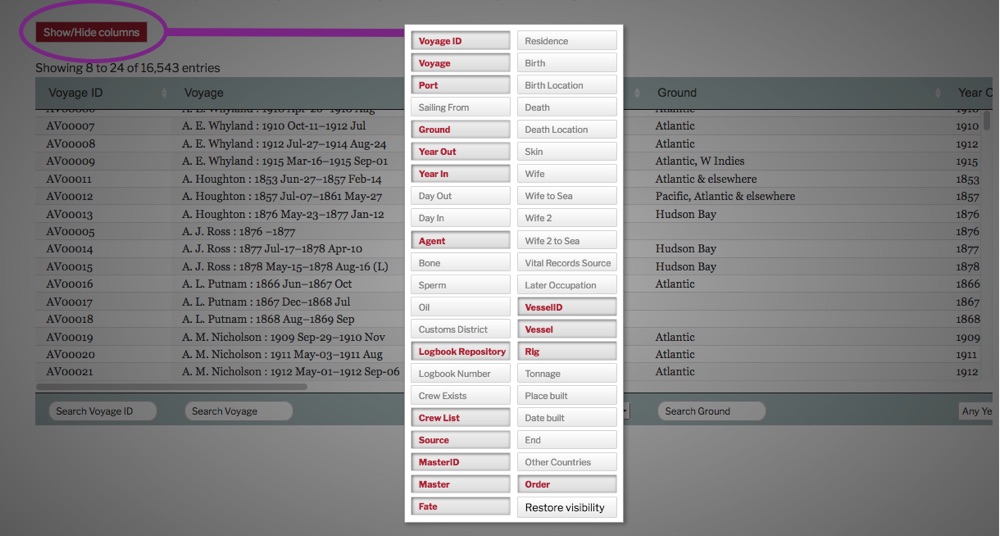
You can choose to hide or show any of the columns in the database. Click the red Show/Hide Columns button in the top left to display all of the column names. Click on a column name to toggle it on or off. Each database has a Columns Definitions page where you can learn more about the content its columns. (Click outside column name box to continue.)
Sorting
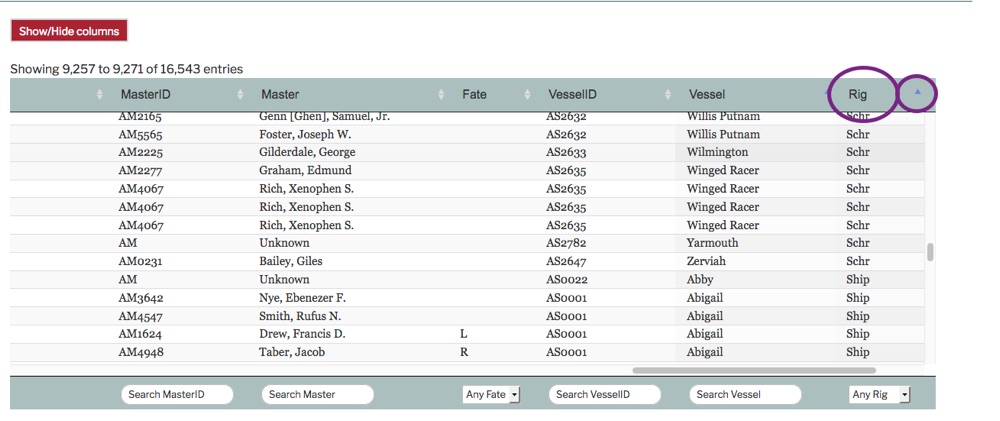
Click on any column heading to sort the database by that column. The triangle to the right of that column name will turn blue to indicate that the column is sorted. Click again on the column heading to reverse the sort order. (The blue triangle will invert.) To add more columns to your sort shift-click on their column headings.
Searching
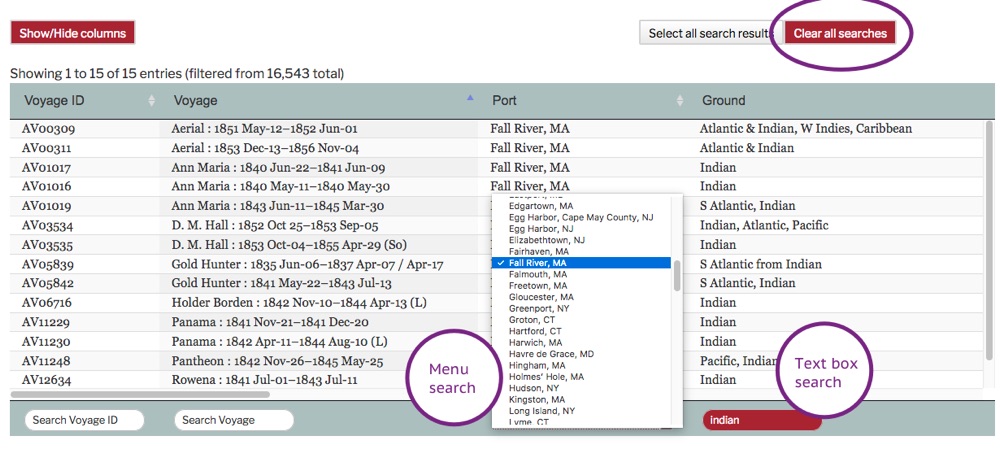
At the top or bottom of each column is a search box. Some columns have a selection menu that will pop up, others have a free form text box. Text searches are not case sensitive.
Multiple search words are treated as if joined with AND, so choosing “Fall River, MA” with the Port menu and typing “indian” in the Ground search box will result in all voyage records that have Port=”Fall River, MA” AND Ground contains “indian”.
Some of the databases are very large—please be patient, your search results may not appear instantaneously. To clear all active searches, use the red “Clear all searches” button in the top right.
Selecting and displaying one voyage
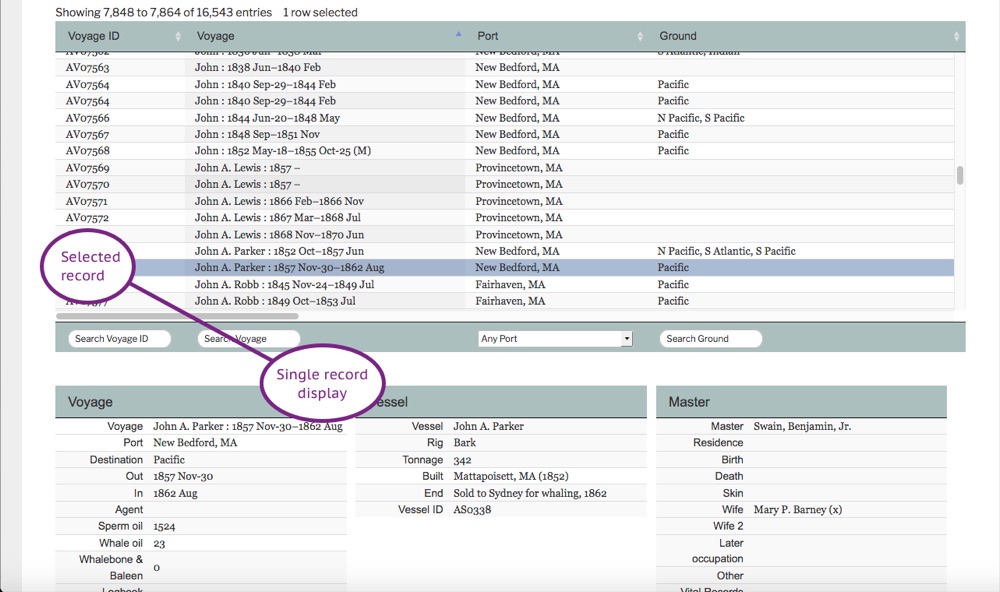
In the Voyages database, click on a single row in the data viewer for a full display of all aspects of the voyage at the bottom of the page.
Selecting multiple records
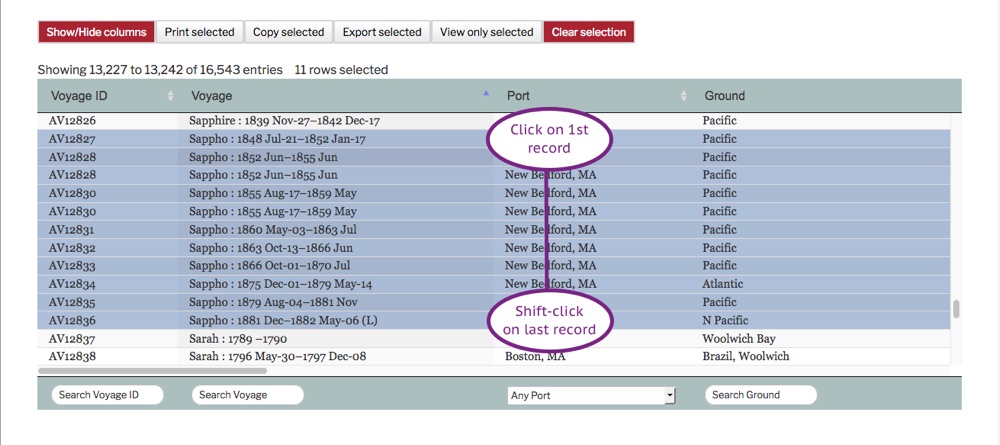 To select more than one row, click on the first row, then add more with shift-click. Depending on your browser and operating system, you may also be able to add individual records using ctrl-click or ⌘-click.
Select all search results

Or, after searching the database you can select the found records by clicking the “Select all search results” button that will appear in the top right. To unselect all selected records, click the red “Clear selection” button.
Printing, copying, exporting
Printing, copying and export all work with a selection, which may include one or more records. For the examples below we’ve selected all the voyages of the bark Sappho. This selection happens to fit neatly in our data viewer window, but your selection might include many more records than you can view at one time.
The set of columns that you’ve chosen with the “Show/Hide” button will be the columns that appear in your print, copy or export.
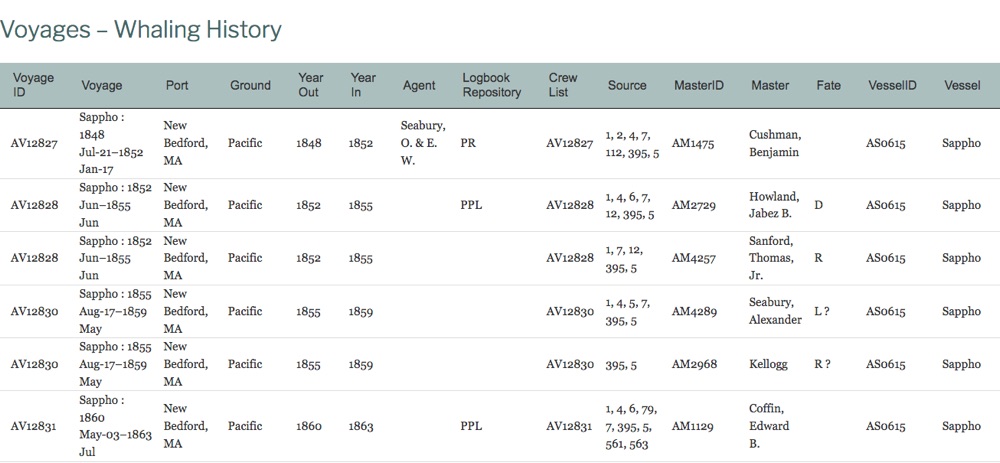 To produce a printable version of the selected records, click on the “Print selected” button in the top left. A new browser window will open with your data in a table. You can then print the page using your browser’s print command. Depending on your operating system, you may also be able to save the output as a PDF file, or email or text it to yourself and others.
Copy
 To copy the selected records to your clipboard, click on the “Copy selected” button. A message will appear to tell you that the data has been copied. You can then paste the data into any other application. It is properly formatted so that you can paste directly into a spreadsheet. It will also format neatly in a word processor. If pasted into a plain text editor, the result will be tab-delimited text.
Export

To export your selection as a CSV file, click on the “Export selected” button. Your computer operating system will prompt you to save the data. The resulting file will be comma-delimited and all columns will be wrapped with quotation marks. The first row will contain the column names. A file in this format can be opened in a spreadsheet, or it may be imported into software for managing databases or performing statistical analysis.